
Operation & Maintenance
Leveling a CNC lathe is the first measurement taken on a machine that has just traveled, and it is the one that decides how much of the factory accuracy survives the journey. The work is a sequence rather than a single adjustment: level the bed roughly, measure the twist at several stations along the guideways, correct it with the leveling pads, re-measure until the readings repeat, then anchor and grout — and only afterwards align the tailstock and confirm the result with a test cut. Take the readings cold, again after the grout has cured, and once more after the spindle has warmed up.
Why leveling decides the accuracy the lathe keeps
A lathe bed is a long casting, and a long casting resting on an uneven floor will deflect — which is the whole physical case for leveling a cnc lathe after shipment. The deflection is small — measured in fractions of a millimetre along the length of the bed — but it is exactly the kind of error the machine is designed to avoid, because the carriage travels on guideways whose straightness defines the geometry of every part cut on the machine. Twist the bed, and the tool path is no longer a straight line relative to the spindle axis. The result is a part that tapers, or a diameter that varies depending on where along the bed the cut was taken.
Two things make this worse than it sounds. The error is not constant, because it changes as the bed warms up, so a part turned in the morning and an identical part turned in the afternoon can differ. And the error is usually attributed to the wrong cause — a worn guideway, a bent workpiece or a tailstock misalignment — when the underlying issue is a bed left twisted by the installation.
Leveling is not a formality to be completed before the machine is handed over to production, which is why it belongs at the front of the commissioning sequence described in the installation and commissioning checklist. Everything downstream — the geometry test, the test cut and the accuracy the machine holds for the next decade — is measured on the bed as it was installed.
The reading that matters is the one taken twice
A single set of level readings is an observation, not a baseline. Leveling is finished when the same readings come back after the machine has stood, after the grout has cured and after the spindle has been warmed up — not when the bubble is in the middle once.
Before the first measurement
Four conditions have to be satisfied before a level is worth placing on the guideways, and leveling a cnc lathe without them produces readings that cannot be trusted, and each of them has a cost attached if it is skipped.
The foundation has to have cured to the point specified in the foundation drawing, because a foundation that is still shrinking will move the machine after it has been leveled. The floor or foundation surface has to be clean, sound and flat enough for the leveling pads to bear properly. The machine has to be free of transit protection — shipping braces removed, rust-preventive coating cleaned from the guideways where the level will sit, and the carriage positioned according to the procedure in the manual. And the ambient conditions have to be reasonable: leveling a machine standing in a draught, in direct sunlight, or in a workshop whose temperature is moving by several degrees an hour produces readings that disagree with each other for reasons that have nothing to do with the machine.
If the machine has to be moved into position, that movement is a lifting operation and belongs to whoever is competent to plan it. The requirements are set out in the Lifting Operations and Lifting Equipment Regulations guidance, and the principle holds anywhere: rated equipment, known lifting points, and a plan made before the load is in the air.
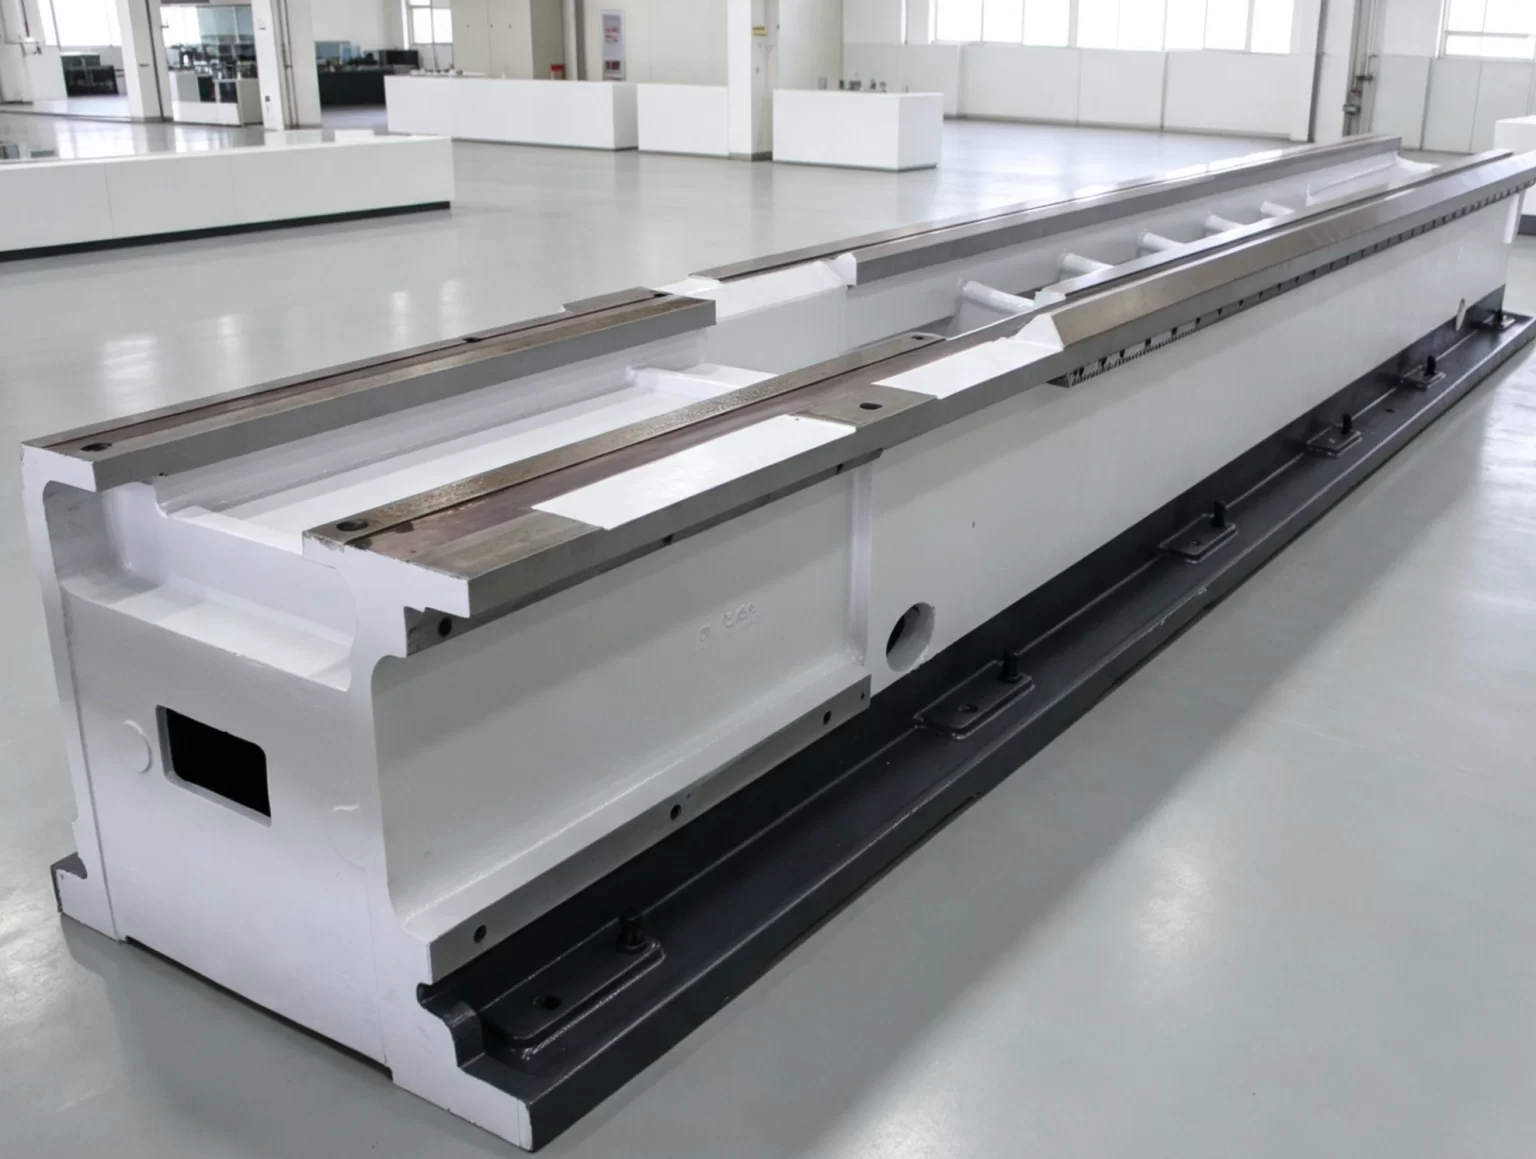
What the job needs
Leveling a cnc lathe is done with instruments rather than with a builder’s spirit level, and the difference matters: a general-purpose level cannot resolve the errors that determine whether a lathe cuts straight.
| Item | What it is for |
|---|---|
| Precision machine level | The primary instrument. A sensitivity of 0.02 mm per metre is the usual machine-tool grade, meaning one division of the bubble corresponds to that rise over that length |
| Straightedge or parallel | To bridge across the bed where a level cannot sit directly on both guideways, and to check that the level is not resting on a burr |
| Leveling pads, wedges or screws | To raise and lower the machine in small, repeatable increments while the readings are being taken |
| Feeler gauges and shim stock | To check for gaps under the pads and to confirm that the machine is bearing on the intended points rather than on one corner |
| Dial indicator with magnetic base | For the tailstock alignment check and for confirming that the carriage or saddle is not moving when the anchors are tightened |
| Test bar | To check spindle axis alignment against the guideways and to support the tailstock alignment measurement |
| Torque wrench | For the anchor bolts, so that each is tightened to the specified value rather than to a feel |
| Notebook or log sheet | For the readings themselves. A leveling job without a record cannot be repeated, compared or defended |
One more item belongs on the list: the machine’s alignment specification, which states the tolerance the readings are compared against. Taking readings without knowing the target turns a measurement into an opinion. If it is not in the documentation that arrived with the machine, ask for it before starting work.
The leveling sequence
Start with a rough level, using a general instrument to bring the machine close, so that it is not resting on two opposite corners and rocking. Then bring in the precision level and work to a rhythm: place it on the guideways at the headstock end and read, move it to the tailstock end without changing its orientation and read again. The two readings are compared, not the absolute values, because it is the difference between the ends that describes the twist in the bed.
Correction is made with the leveling pads: raise the low side slightly, re-read, and continue in small increments. Working in small increments in a fixed order converges; large adjustments at one end and then the other leave the machine swinging between two faults.
Repeat until consecutive sets of readings match. The cycle usually takes a few passes on a lathe and more on a long bed, and the most common cause of extra passes is adjusting too much at once.
Bed twist, and how it shows up in the part
Bed twist is a rotation of the bed about its long axis, and it is the fault that leveling a cnc lathe exists to remove. Its signature in the finished part is a taper: a shaft turned between centers comes out slightly conical, and the diameter at the headstock end differs from the diameter at the tailstock end. Because a lathe is expected to turn parallel, that error is usually blamed on the tailstock, the workpiece or the tool, and the adjustment made in response tightens the wrong thing.
The reason twist is easy to miss is that it is small and it is thermal. A bed twisted by a few hundredths of a millimetre across its width will produce a measurable taper on a long part, and the readings drift as the machine warms. The second set of readings, taken warm, is the more honest description of the machine in production.
A second form of the same problem is an angular error along the bed in the horizontal plane, which affects the position of the saddle rather than the height of the tool. It is checked by measuring the guideways in plan as well as in level, and corrected in the same cycle of small adjustments.
Anchors, pads and grout
Anchor bolts hold the alignment that has already been achieved; they do not produce it. Tightening an anchor on a machine that is still being leveled pulls the bed towards that point, which is why the sequence is level first and anchor afterwards.
The leveling elements themselves deserve attention. Pads, wedges or jacking screws should bear on a sound, flat surface with no gap underneath; a machine standing on three effective contacts and a shim is a machine that will move. Where the installation calls for grouting, the grout is placed after the alignment is confirmed and left to cure before the alignment is checked again, because curing is itself a small movement.
The final check belongs after everything else has settled: readings again after the grout has cured, and once more after the spindle has been run through its warm-up routine. That third set is the one that predicts how the machine will behave in production, and it is the set worth recording as the installation baseline.
Aligning the tailstock and proving it with a cut
Tailstock alignment comes last, because it is measured relative to a bed that has to be correct first. The measurement is made with a test bar mounted between the spindle and the tailstock center, or with a dial indicator on a bar held in the chuck with the tailstock quill advanced — the objective in both cases being to find whether the tailstock center is on the spindle axis in the horizontal plane. Correction is made with the tailstock offset adjustment, in small steps, re-measuring after each one.
Then prove the whole installation with a cut rather than with a gauge. Turn a bar supported at both ends over a length that uses most of the bed, at a moderate depth of cut, and measure the diameter at several points along it. A parallel result confirms that the bed, the spindle and the tailstock are working together. A taper, on the other hand, tells you which of the three to look at next — and because the readings were taken after warm-up, the answer describes the machine as it is actually used.
Recording readings you can trust
The value of leveling a cnc lathe is mostly in the record it leaves behind. Whatever the geometry later does — a taper appearing, a surface finish drifting — the installation record is the baseline that says whether the machine has moved or was set up that way. Keep the entries specific.
| Conditions | Date, ambient temperature, machine temperature state (cold, after warm-up), and how long the machine had been standing before the readings were taken |
|---|---|
| Positions | Where the level was placed for each reading, identified by station along the bed, and the orientation of the instrument |
| Readings | The actual values, in the graduation of the instrument used, recorded as raw numbers rather than as “pass” |
| Target | The alignment tolerance from the machine documentation that the readings were compared against |
| Adjustments | Which pad, wedge or screw was turned, in which direction, and the effect on the next reading |
| Final state | The readings after grout cure and after warm-up, with the anchor torque values applied recorded alongside |
| Test cut | The bar diameter at each measuring position, the length turned, the depth of cut and the spindle speed used |
| Who did it | The initials of the person who took the readings, so a later comparison has an owner |
This record is also what makes the routine work in the daily and weekly maintenance checklist meaningful. Comparing a periodic geometry check against an unknown starting point proves nothing; comparing it against the installation readings shows a trend while there is still time to correct it.
Before the installation is signed off
- Readings taken cold, after grout cure and after the warm-up routine, all recorded
- Anchor bolts at the specified torque, and the level readings unchanged after tightening
- Test cut turned over a representative length, diameters measured at each position
- Foundation and pads sound, with no gap under any leveling element
- Alignment specification on file, so the next geometry check has something to be compared against
- Shipping braces removed and their removal recorded on the checklist from the manual
Frequently asked questions
How level does a lathe actually need to be?
Level to the tolerance in the machine’s alignment specification, and treat that document as the target rather than a general idea of “level”. Absolute level matters far less than the absence of twist: a machine sitting on a floor with a slight overall slope but with no twist between the ends of the bed will cut parallel, while a machine that is level end to end but twisted across the bed will not. That is why the readings are compared with each other, not judged against a horizon.
Can leveling a cnc lathe be done with a builder’s spirit level?
Only for the rough stage. A general-purpose level does not resolve the errors that produce a taper, which are on the order of hundredths of a millimetre across the width of a bed. The working instrument is a precision machine level, typically with a sensitivity of 0.02 mm per metre, used on the guideways or on a straightedge bridging them. The rough stage still needs doing first, because a machine resting on two diagonal corners cannot be brought in with fine adjustments.
How long should the machine stand before the final readings?
Until the foundation and any grout have cured to the point specified in the foundation drawing, and long enough for the machine to have taken up its position on the pads. Practical installations take the readings in three states: immediately after alignment, after the grout has cured, and after the spindle warm-up routine. The third set is the baseline that later geometry checks are compared against, because it describes the machine at working temperature.
What if the readings drift every time I take them?
Look for the environment before suspecting the machine. A bed in a draught from a door, in direct sunlight, or in a workshop whose temperature is still moving will produce readings that disagree with each other for reasons unrelated to alignment. Check that the level is seated on clean metal with no burr or swarf under it, that the instrument has had time to reach ambient temperature, and that the machine is not being adjusted between passes. If the readings still move, the foundation or the pads need attention rather than more adjustment.
Does a new machine need leveling if the factory aligned it?
Yes, and this is the most common misunderstanding about leveling a cnc lathe. The alignment performed in the factory is measured on the builder’s own foundation and is not preserved by transport. The machine is lifted, tilted, driven over roads and set down on a different floor, and the bed will take up the shape of whatever it is standing on. Leveling after installation is the step that transfers the factory geometry onto your foundation; skipping it means the machine is measured against a floor rather than against a specification.
Next step
Ask for the alignment specification before the machine lands. Send the model and the foundation details and we will return the leveling and alignment procedure that applies to it — the measurement positions, the target tolerances, the anchoring sequence and the record sheet to complete — plus the acceptance readings that should be taken after warm-up, so the installation is documented from the first day. The wider sequence this sits inside is in the installation and commissioning checklist, and the machine-side details are on the lathe series pages.
Request the leveling and alignment procedure
WhatsApp: +86 15502628547 · Email: info@dhlathe.com
Tell us the model and whether the floor is an existing slab or a new foundation. The procedure comes back with the measurement positions and the target values marked on them.
